Check visibility first
Whether a target can rise at your latitude and how high it gets decides whether it is worth putting on the list. Check hemisphere visibility
The success or failure of an observing session is largely decided before you ever set out. No matter how capable your equipment is, it cannot offset the effect of clouds, moonlight, and light pollution on imaging and visual observing. This page systematically covers two topics: the criteria for choosing an observing site, and how to build a plan for an entire night, including assessing light pollution, forecasting weather and seeing, checking visibility and transit times, and arranging a target list.
An ideal observing site requires balancing several mutually constraining conditions; a single location can rarely be optimal across all metrics at once, so your actual choice should be weighted toward the priorities of your observing goals. The table below summarizes the main site selection factors.
| Factor | Meaning | How to assess |
|---|---|---|
| Darkness | Low artificial light pollution, faint night-sky glow, visible Milky Way | Light pollution maps, Bortle scale, SQM measurements |
| Seeing | Weak atmospheric turbulence, steady star images, high resolution | Smooth high-altitude airflow, distance from surface heat sources, Clear Sky Chart forecasts |
| Clear | High proportion of clear nights, low cloud cover | Climate statistics, satellite imagery, numerical weather prediction |
| Transparency | Weak atmospheric extinction and scattering, low precipitable water | Clear Sky Chart transparency row, relative humidity |
| Open horizon | No obstruction from mountains, trees, or buildings | On-site survey, horizon azimuth–altitude map |
| Altitude | High elevation reduces atmospheric thickness and water vapor | Topographic maps, elevation data |
| Accessibility and safety | Road conditions, parking, overnight safety | On-site confirmation; never sacrifice safety for dark skies |
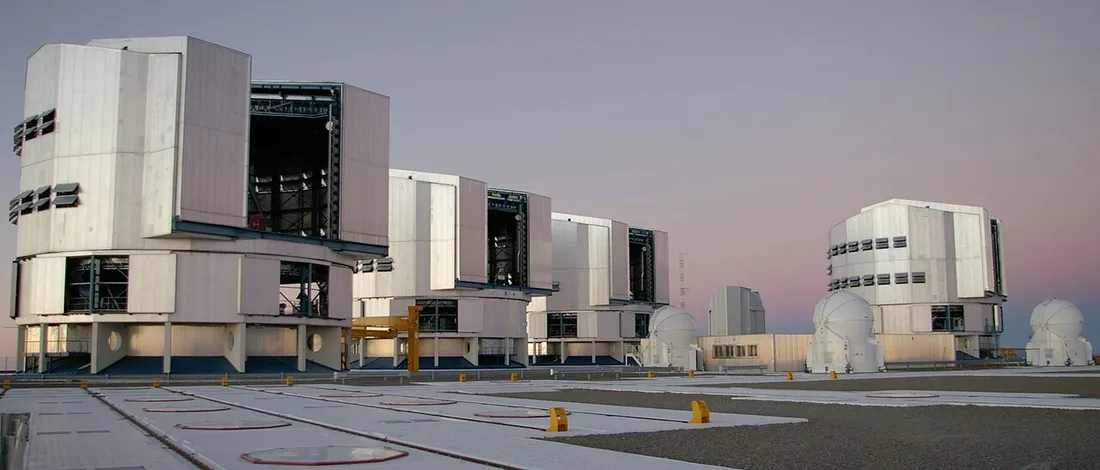
Professional observatory sites are almost all located in a few types of region—high-altitude, dry mountainous areas typified by Chile’s Atacama Desert and Mauna Kea in Hawaii. Mauna Kea has more than 300 clear nights per year, with median seeing often better than 0.6 arcseconds; some Atacama sites have usable nights amounting to nearly 90% of the year. These places simultaneously satisfy high altitude, dryness, low cloud cover, dark skies, and a stable atmosphere—precisely the result of stacking the factors above. Amateur sites cannot reach this level, but the dimensions of assessment are the same.
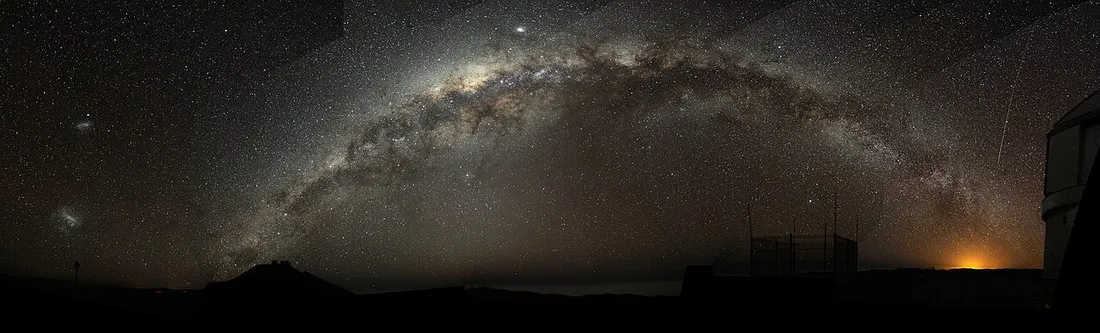
There are three complementary tools for judging how “dark” a site is: the qualitative Bortle classification, quantitative sky brightness measurement, and globally covering light pollution maps.
The Bortle dark-sky scale was proposed by amateur astronomer John E. Bortle in 2001 in Sky & Telescope. It divides the night sky into classes 1 through 9 based on naked-eye sky phenomena: class 1 is pristine dark sky, class 9 is an inner-city sky—the smaller the number, the darker the sky. It is a qualitative scale calibrated against the observing experience.
The Sky Quality Meter (SQM) quantitatively measures the zenith sky brightness in units of “magnitudes per square arcsecond (mag/arcsec²).” A larger value means a darker sky, the opposite direction from the Bortle scale. The typical correspondence is as follows.
| Bortle class | SQM (mag/arcsec²) | Sky characteristics |
|---|---|---|
| 1 | about 21.7–22.0 | Pristine dark sky; zodiacal light and airglow clearly visible |
| 2–3 | about 21.3–21.7 | Rural dark sky; rich Milky Way structure |
| 4 | about 20.4–21.3 | Rural–suburban transition; Milky Way visible but the low sky is bright |
| 5–6 | about 19.1–20.4 | Suburban; Milky Way faint or only discernible near the zenith |
| 7–8 | about 18.0–19.1 | City edge to urban; only bright stars visible |
| 9 | below about 18.0 | Inner city; the whole sky is bright |
Note that SQM readings are affected by the Moon phase, zodiacal light, and airglow; they should be taken toward the zenith on a moonless night away from the Milky Way plane, with conditions recorded for comparison.
Light pollution maps (such as lightpollutionmap.info) overlay satellite-observed artificial nighttime brightness on a terrain base map, usually presented with color coding: deep blue to black corresponds to Bortle 1–3, green to 4–5, yellow-orange to 6–7, and red-white to 8–9. Most maps let you click any coordinate to read off that point’s Bortle class and modeled SQM value, making them the most efficient tool for quickly screening candidate sites before a trip.
Atmospheric seeing refers to the shimmer and blur of star images caused by atmospheric turbulence, and is the main factor limiting the resolution of planetary, lunar, and high-magnification visual observing.
Cause: as light passes through atmospheric layers whose refractive index varies with temperature and wind speed, it undergoes random deflection, broadening a point source into a diffuse blob that jitters constantly. Strong wind shear brought by the high-altitude jet stream, convection from the heated ground, and heat sources in the telescope’s near field (the ground, walls, and air inside the tube) all degrade seeing.
Measurement: it is usually expressed as the full width at half maximum (FWHM) of the star image at a wavelength of 500 nm, in arcseconds (″). Another common quantity is the Fried parameter (r₀), the equivalent aperture at which “the diffraction-limited resolution exactly equals the seeing-limited resolution”; a larger r₀ means better seeing. The relationship between the two is approximately:
ε ≈ 0.98 · λ / r₀where ε is the seeing angle (in radians), λ is the wavelength, and r₀ is the Fried parameter.
| Seeing FWHM | r₀ (at 500 nm) | Rating |
|---|---|---|
| about 0.4″ | about 25 cm or more | An excellent night at a top-tier site |
| around 1.0″ | about 10–15 cm | Good seeing at an average site |
| 2″–4″ | about 3–6 cm | Average to poor; planetary detail is limited |
Because resolution improves with wavelength, the seeing limitation is relatively relaxed at longer wavelengths, which is one reason large-aperture telescopes more easily approach the diffraction limit in the infrared. Seeing quality is unrelated to sky transparency: a cloudless high-pressure clear night may have very poor seeing due to a high-altitude jet stream, while a night with dense thin cloud may instead have steady star images.
Before observing, you need to combine multiple data sources to judge whether the night is usable. The following types of forecast are tailored to astronomical use.
When judging transparency, watch precipitable water and relative humidity: more water vapor means stronger extinction and scattering, lower contrast on faint objects, and too high a humidity carries a risk of dew.
Planetarium and planning software is used to “rehearse” the entire night before setting out—checking the sky at any moment, an object’s altitude above the horizon, its transit time, and its rise and set times.
| Software | Platform | Main use |
|---|---|---|
| Stellarium | Desktop / web / mobile | Simulate the sky at any moment; check object altitude, transit, moonrise and moonset |
| SkySafari | Phone / tablet | Real-time field reference, with Go-To planning paired with an equatorial mount |
| Telescopius | Web | Object library and visibility curves, field-of-view simulation, observing list management |
| Cartes du Ciel | Desktop | Free open-source planetarium with detailed catalogs and equipment control |
The core output of these tools is the curve of an object’s altitude versus time and its transit time. Whether a given celestial object can rise at a given latitude, how high it can reach, and which months of the year are suitable for observing it depend on its declination and the observing site’s latitude; see /astronomy/observing/hemisphere-visibility/ for details. At transit an object is at its highest altitude, takes the shortest path through the atmosphere, and suffers the least extinction, making it the best time to observe or image—a principle directly related to the diurnal motion discussed in /astronomy/foundations/celestial-coordinates/ and /astronomy/foundations/apparent-motion/.
The usable observing time is determined jointly by the Moon phase and how far the Sun is below the horizon.
Moonlight is natural “light pollution.” The week or so around new Moon is the golden window for deep-sky observing and imaging; the bright lunar surface and the planets, by contrast, are unaffected by moonlight and can be scheduled near full Moon when the target is near transit and high in the sky. When planning, also check moonrise and moonset times: even on a bright-Moon night, the interval from moonset to astronomical dawn remains usable for deep-sky work.
Twilight is divided into three types based on how far the Sun’s geometric center is below the horizon (the degrees below refer to the angle below the horizon).
| Type | Sun altitude range | Observing significance |
|---|---|---|
| Civil twilight | 0° to −6° | Natural light is still sufficient for outdoor activity; bright planets such as Venus are visible |
| Nautical twilight | −6° to −12° | The horizon can still be discerned on a moonless night; bright stars can be used for navigation |
| Astronomical twilight | −12° to −18° | Once the Sun is below −18° the sky is fully dark, and point sources such as stars can be observed |
True “astronomical night” begins after the Sun drops to 18° below the horizon and ends before the Sun rises to −18° the next day. The length of this period varies with season and latitude, and at high latitudes in summer it may disappear entirely (white nights); it directly determines the number of hours actually usable for deep-sky observing that night. The three types of twilight at dawn and dusk are fully symmetric, likewise defined by the altitude of the Sun’s geometric center. The “blue hour” often mentioned in photography roughly corresponds to the low-light stage between civil and nautical twilight.
Gather the Moon phase, weather, twilight, and visibility information into a single, time-ordered target list.
Ordering principle: arrange objects by the time they cross the meridian (transit) rather than by interest, trying to ensure each object is observed or imaged near transit when it is high in the sky. Handle objects already sinking toward the west first, and leave objects rising in the east for the latter half of the night, to reduce the effects of low-altitude atmospheric extinction and turbulence.
Meridian flip: the meridian is the great circle on the celestial sphere connecting due north, the zenith, and due south, and an object is at its highest altitude as it crosses the meridian. When tracking with a German Equatorial Mount, if you continue tracking westward after the target crosses the meridian, the tube will eventually collide with the tripod or base. You therefore need to perform a “meridian flip”—swapping the tube and counterweight to the opposite side around the right-ascension axis, so the telescope continues tracking after switching from one side of the meridian to the other. The flip interrupts the current exposure and temporarily loses the framing and guiding, so long-exposure imaging needs to reserve time for the flip during planning and re-register the framing afterward using plate solving. Fork mounts and some designs can avoid this problem.
A target list entry usually contains the following fields.
| Target | Transit time | Maximum altitude | Suggested focal length / field | Notes |
|---|---|---|---|---|
| M42 Orion Nebula | 21:40 | 55° | Medium focal length | Shoot first; sinks west after midnight |
| M51 Whirlpool Galaxy | 00:30 | 70° | Long focal length | Crosses meridian in the latter half of the night; watch for the flip |
| Galactic center | 02:10 | 30° | Wide angle | Best before dawn; large low-altitude extinction |
Record each target’s coordinates, required field of view or focal length, and suggested exposure, and reserve buffer time for focusing, polar alignment, meridian flips, and switching targets.
Set the window: check the Moon phase and moonrise/moonset to determine the usable interval that is moonless or after moonset; choose a suitable Moon phase based on target type (deep-sky / planetary and lunar).
Check the weather: combine the Clear Sky Chart, Clear Outside, satellite imagery, and jet stream forecasts, compare cloud cover, transparency, and seeing, and confirm once more just before departure.
Compute astronomical night: determine the interval from the end of astronomical twilight to the start of astronomical dawn—this is the effective duration usable for deep-sky work.
Order by transit: use Stellarium or Telescopius to list each target’s transit time and altitude curve, order them by time window, and mark targets that will undergo a meridian flip.
Build the list: for each target write down coordinates, field of view, exposure, and notes, and prepare a backup target and a backup site.
Check visibility first
Whether a target can rise at your latitude and how high it gets decides whether it is worth putting on the list. Check hemisphere visibility
Then check conditions
How to read the on-site atmosphere and sky state. Observing conditions
After observing ends, recording the night’s actual conditions and results is the basis for improving future planning. Recommended records: date and location, SQM reading or visual Bortle estimate, subjective ratings of seeing and transparency, Moon phase, the targets observed or imaged and their parameters, and equipment problems and their solutions. Imagers should additionally record the actual number of exposure frames for each target, gain, filters, and discard ratio. Records accumulated over the long term help identify a site’s usability patterns across different seasons and calibrate the local accuracy of each forecast source.
After completing the workflow above, an observing session will come closer to running as planned rather than relying entirely on on-the-spot judgment. For on-site equipment setup, reading the atmosphere, and visual technique, continue with /astronomy/observing/conditions/; for the basics of celestial coordinates, magnitude, and visibility, see /astronomy/foundations/magnitude/ and /reference/glossary/.