Visual Observing Techniques
Visual observing means viewing celestial objects directly with the naked eye through binoculars or a telescope, without a camera. The results depend not only on the aperture of the instrument but also heavily on the eye’s state of dark adaptation, the observer’s visual technique, and sky conditions. This page systematically explains the physiological and optical principles behind these factors, the relevant calculation formulas and typical values, and the common methods for finding and recording objects.
Fundamentals of low-light vision in the human eye
Section titled “Fundamentals of low-light vision in the human eye”The human retina contains two types of photoreceptor cells, and the difference in their properties underlies all techniques for observing faint objects:
| Cell type | Number and distribution | Sensitivity | Color vision | Resolution |
|---|---|---|---|---|
| Cone cell | About 6 million, concentrated in the fovea | Suited to photopic (bright-light) vision | Yes | High |
| Rod cell | About 120 million, distributed around the fovea | Suited to scotopic (dark) vision | No | Low |
Rod cell density peaks at about 20° away from the fovea, while the fovea itself contains almost no rod cells. This distribution simultaneously explains the origins of both dark adaptation and averted vision.
The transition from photopic to scotopic vision is also accompanied by the Purkinje effect: as dark adaptation progresses, the eye becomes relatively more sensitive to short-wavelength (blue-green) light and less sensitive to long-wavelength (red) light. This is one reason why celestial objects rarely show color in the dark night sky.
Dark adaptation
Section titled “Dark adaptation”Dark adaptation is the process by which the eye’s sensitivity gradually increases after moving from a bright environment into darkness. Its essence is the resynthesis of visual pigment in the photoreceptor cells that has been bleached by strong light. The visual pigment in rod cells is rhodopsin, which breaks down under light into retinal and opsin, and in darkness is regenerated when 11-cis-retinal recombines with opsin.
Dark adaptation occurs in two stages, with markedly different time scales:
| Stage | Dominant cell | Time to reach maximum sensitivity |
|---|---|---|
| Pupil dilation | —— | Seconds to tens of seconds |
| Cone adaptation | Cone cells | About 9–10 minutes |
| Rod adaptation | Rod cells | About 30–45 minutes |
Rod cells begin to improve about 5–10 minutes after entering darkness, but largely complete their adaptation only after 20–30 minutes, with full adaptation taking more than 40 minutes. After thorough dark adaptation, the eye’s sensitivity to light can increase by roughly ten thousand to a million times compared with daylight.
Because rod cells are insensitive to long-wavelength light, red light hardly breaks down rhodopsin at all, making it the standard illumination for nighttime observing:
- Use a dimmable red light headlamp or flashlight throughout to read star charts and operate equipment, keeping the brightness only as high as necessary.
- Avoid direct white light; phones should have a red night filter enabled and set to the dimmest level, or be avoided altogether.
- A single exposure to bright white light can set dark adaptation back substantially, requiring another ten-plus minutes of waiting to recover.
- When you must look at a bright light, use only one eye (covering the other) to preserve the dark adaptation of the single eye.
Averted vision
Section titled “Averted vision”Averted vision means, when observing a faint target, directing your gaze slightly to one side of the target so that its light falls on the rod-rich region of the retina rather than the low-sensitivity fovea, thereby improving the visibility of the faint target.
Key points and values:
- Rod density peaks at about 20° away from the fovea, but owing to factors such as neural processing, the optimal offset angle in practice is about 8°–16°; too large an offset risks the target falling onto the blind spot corresponding to the optic disc and disappearing.
- While averting your gaze, keep your attention “locked” on the target itself.
- Keep the target moving slightly within the field of view (or gently rock the telescope); a stationary faint image is more easily overlooked, because the visual system is more sensitive to motion than to stillness.
- Combine this with relaxed breathing, and avoid holding your breath, which reduces the oxygen supply to the retina.
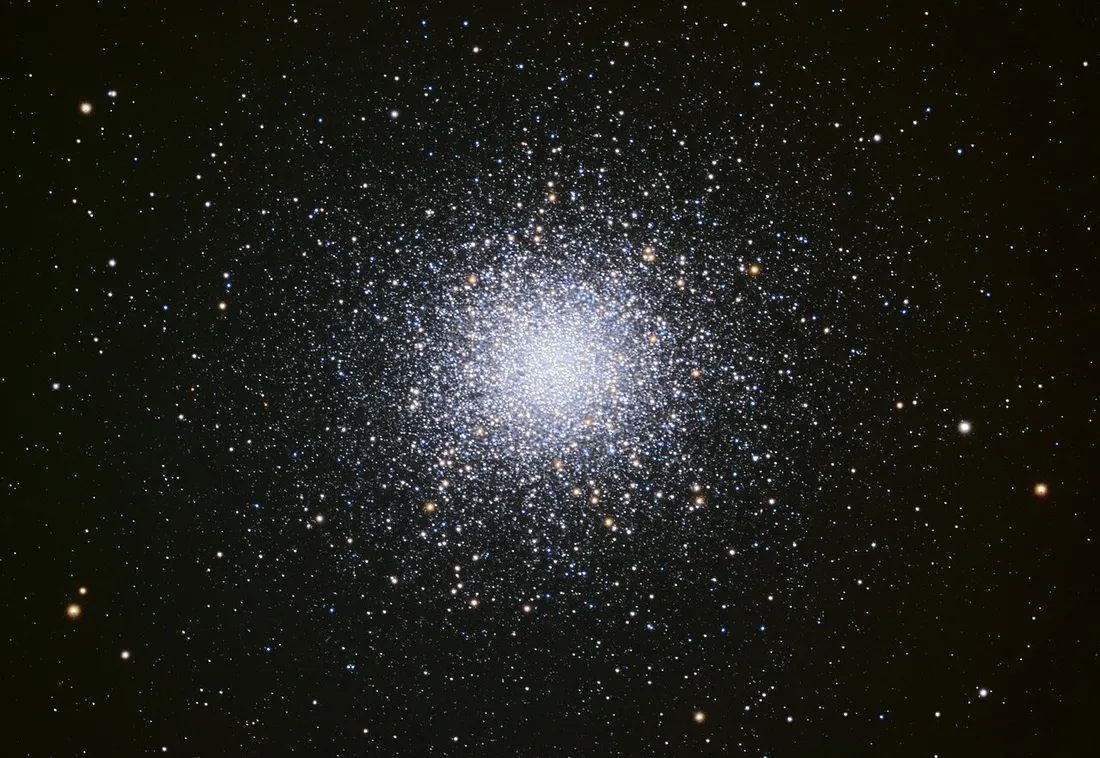
Empirically, thorough dark adaptation combined with averted vision lets an observer detect targets about 3–4 magnitudes fainter than with direct vision (a sensitivity increase of roughly 20–40 times). Stars at the edge of globular clusters and the diffuse structures of faint galaxies and nebulae often show the phenomenon of being “invisible to direct vision but discernible with averted vision.” The Hercules globular cluster M13 below is a common target for practicing averted vision.
For the concept of magnitude and the meaning of limiting magnitude, see the magnitude system.
Choosing between binoculars and telescopes
Section titled “Choosing between binoculars and telescopes”For beginners, binoculars are often underrated: they offer a wide field of view, are quick to learn, portable, and more comfortable to use with both eyes—ideal for scanning the Milky Way, open clusters, comets, and the lunar surface. Telescopes have larger aperture and magnification, suited to planets, resolving globular clusters, and galaxy detail, but require extra operations such as finding objects, focusing, and even polar alignment.
| Comparison item | Binoculars | Telescope |
|---|---|---|
| Magnification | Low (7–10×) | High (tens to hundreds of times) |
| Field of view | Wide, convenient for finding targets | Narrow, requiring a wide-field search first |
| Learning difficulty | Very low | Higher (finding objects, focusing, polar alignment) |
| Suitable targets | Milky Way, large clusters, comets, lunar surface | Planets, globular clusters, galaxy detail |
| Portability | High | Lower |
Binocular specifications are given as “magnification × objective aperture (mm)”; for example, 7×50 means 7× magnification with a 50 mm objective aperture. The 7×50 and 10×50 are commonly used in astronomy:
- 7×50 gives an exit pupil of about 7.1 mm, a wider field of view, and less shake when handheld;
- 10×50 gives a 5 mm exit pupil, with slightly higher magnification but more noticeable handheld shake.
Handheld binocular magnification is usually best kept at 7–10×; beyond about 15×70 a tripod is generally required, while image-stabilized models can be handheld up to about 20×. Eyeglass wearers should pay attention to eye relief, which generally needs to exceed 16 mm to see the full field of view.
Magnification, exit pupil, and field of view
Section titled “Magnification, exit pupil, and field of view”Understanding the following quantities is the basis for selecting eyepieces and judging whether an image is appropriate. Note that all formulas are given as inline code.
- Magnification =
telescope objective focal length ÷ eyepiece focal length. Changing the eyepiece changes the magnification. - Exit pupil =
aperture ÷ magnification(mm), i.e., the diameter of the light beam entering the eye; for binoculars this equals “aperture ÷ magnification.” - True field of view ≈
eyepiece apparent FOV ÷ magnification; the higher the magnification, the narrower the visible region of sky.
The choice of exit pupil should match the eye’s maximum pupil at night:
| Age / state | Maximum nighttime pupil |
|---|---|
| Young, fully dark-adapted | About 7 mm |
| Over 50 years old | Usually no more than 5 mm |
Practical points:
- If the exit pupil is larger than your own maximum pupil, the excess light beam is blocked by the iris and wasted, effectively reducing the aperture.
- When the exit pupil is too small (less than about 0.5 mm), the image is dim, and floaters and other debris within the eye become more apparent.
- For large, faint nebulae, use low magnification and a large exit pupil; for resolving globular clusters and observing planets, use high magnification and a small exit pupil.
- One telescope equipped with a “low, medium, high” set of three eyepieces is basically sufficient.
Visual filters
Section titled “Visual filters”Visual filters improve the contrast of certain objects against background light pollution by transmitting only specific wavelengths. Common types and their applications:
| Filter type | Main transmitted wavelengths | Best-suited targets |
|---|---|---|
| UHC (Ultra High Contrast) | OIII (496/501 nm) and Hβ (486 nm) | Emission nebulae, planetary nebulae, supernova remnants |
| OIII | OIII only (496/501 nm) | Planetary nebulae, oxygen-rich emission nebulae |
| Hβ | Hβ only (486 nm) | A few specific emission nebulae (e.g., the Horsehead Nebula) |
| Broadband / light pollution filter | Wider passband | General reduction of light pollution |
Star-finding methods
Section titled “Star-finding methods”To aim a telescope at a faint target, the following three methods are commonly used together, from easiest to hardest:
- Finderscope: a small-aperture, low-magnification auxiliary scope with a larger field of view than the main telescope, used for coarse positioning.
- Reflex finder / Telrad: a 1× (no magnification) device that projects red concentric rings onto a transparent screen. The Telrad projects three rings at 0.5°, 2°, and 4°, which can serve as an angular-distance ruler on the sky.
- Star hopping: starting from a bright star visible to the naked eye, “hop” step by step toward the target along patterns of stars (asterisms), referring to a star chart.
-
Plan the route: locate the target on a star chart and determine a route that starts from a bright star and reaches the target via several asterisms.
-
Coarse positioning: use a finderscope or Telrad to point the telescope at the starting bright star. A telescope’s field of view is usually less than 1°, and binoculars rarely exceed 8°, so this step is needed to establish orientation.
-
Hop step by step: following the star chart, move in sequence to the next asterism, using the Telrad rings or finderscope field of view as an angular-distance reference. For example, to locate M13, first find the two stars ζ and η Herculis, then move to about two-thirds of the way between them.
-
Confirm the target: after confirming the target at low magnification in the main telescope, switch to high magnification or add a filter for a closer look.
Finding objects and limiting magnitude are also constrained by sky conditions; see hemisphere visibility and observing conditions.
Factors affecting visual results
Section titled “Factors affecting visual results”| Factor | Effect |
|---|---|
| Aperture | Determines light-gathering power and the resolvable limiting magnitude; the larger the aperture, the fainter the objects that can be seen |
| Seeing | Atmospheric turbulence determines the stability and sharpness of high-magnification images, mainly affecting planets and double stars |
| Transparency | Atmospheric absorption and scattering of starlight, affecting the visibility of faint, diffuse objects |
| Light pollution | Raises the background sky brightness, lowers contrast, and significantly depresses the limiting magnitude |
| Dark adaptation and observing technique | Affect the effective sensitivity at the eye, equivalent to a difference of several magnitudes |
Visual records
Section titled “Visual records”Visual records help compare observations of the same target across different nights and different instruments, and also train the thoroughness of one’s observation. It is recommended to record at least the following:
-
Basic parameters: date, time, location, equipment, eyepiece and magnification, and whether a filter was used.
-
Sky conditions: transparency, seeing, the presence of moonlight, and the level of light pollution.
-
Visual sketch: draw on paper the shapes, relative positions, and approximate brightness of the stars and target within the field of view, and mark the orientation.
-
Degree of visibility: whether the target is visible with direct vision or requires averted vision, and which structures can be discerned.
-
Review: observe the same target multiple times and record how the discernible detail changes with technique and conditions.
Visual observing cannot reproduce the color and detail of long-exposure photographs, but its immediacy and sense of firsthand experience are its unique value. Once you have mastered dark adaptation and averted vision, even a single pair of 50 mm binoculars can reveal a considerable number of deep-sky objects.
References
Section titled “References”- Adaptation (eye) — Wikipedia: the physiological mechanism of dark adaptation, rod/cone adaptation times, and rhodopsin regeneration.
- Averted vision — Wikipedia: the definition of averted vision, rod distribution, and the optimal offset angle.
- Binoculars — Wikipedia: magnification and aperture notation, the exit-pupil formula, eye relief, and the upper limit of handheld magnification.
- Star hopping — Wikipedia: the principle of star hopping, finderscopes/reflex finders, and field-of-view references.
- Binocular Basics — Sky & Telescope: terminology for astronomical binoculars and a comparison of the exit pupil and field of view of 7×50 and 10×50.
- UHC Filter — Astro-Observer: the transmitted wavelengths and suitable objects for UHC/OIII/Hβ visual filters.